
By Joseph Raczynski
So you want to have your own cryptocurrency, eh? It is surprisingly not too cumbersome to create. If you have some very basic coding skills, general understand of a digital wallet, and the ability to follow point by point instructions, this should take about 90 minutes. I will guide you through the process of launching your own token to fund your company, or more than likely simply test how to create an Ethereum (ERC20) token. I am not responsible for anything that comes from your use of this code or the outlined process. Use at your own risk.
Recently I was asked to put together a more formal booklet on how someone could technically launch an ICO (Initial Coin Offering) in order to create a blockchain enabled cryptocurrency. I wrote up all of the various components and loads of caveats around all of the considerations. In order to do this properly, you should have a full blown business plan, marketing master plan, have sought legal compliance, and a whole host of other services. To that end, there is a new cottage industry surrounding taking companies through the ICO process. ICO Box is one such company that specializes in this end to end consulting.
For the sake of this guide, I will walk you through all of the steps to create your first token for your project right here. Some context, I based this off of my upcoming ICO for DC WiFi as the example.
Part 1: You will need the following:
- Buy some ETH (if you are new to this, buy it from Coinbase)
- A text editor for your code modification (Open a Text file on Windows)
- Download a digital wallet (MetaMask)
- Easy Compilier (via the web Solidity Remix IDE Compiler)
Part 2: Business Decisions
You shockingly need very little to get started with your token creation. You will need four pieces of information; 1) Name of the Token, 2) Token Symbol (like a stock ticker), 3) The Token Decimal Places (making the token divisible), and 4) The total number of tokens in circulation.
In short:
- Number of Tokens You Will Assume (Will be all of the coins initially)
- Total Tokens in Circulation (ranges from 10,000 to 1,000,000,000)
- Name of the Token
- Token Decimal Places (usually 18 places)
- Token Symbol (use three or four letters)
My real example: (see live)
- Number of Tokens You Will Assume = 1,000,000,000
- Total Tokens in Circulation = 1,000,000,000
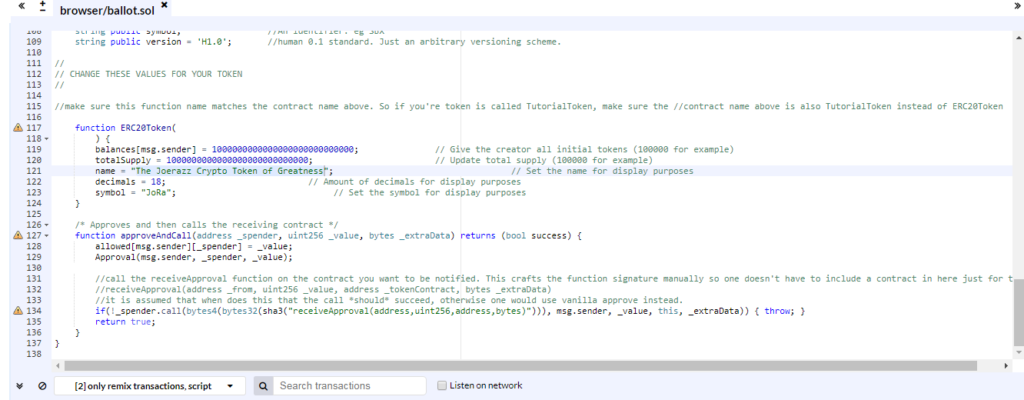
- Name of the Token = The Joerazz Crypto Token of Greatness
- Token Decimal Places = 18
- Token Symbol = JoRa
Part 3: The Contract Coding
Now that you know the basics, copy and paste all of the code below into your your code editor, or a text document. Simply focus on changing the five facets from above in the red section of code below.
pragma solidity ^0.4.4; contract Token { /// @return total amount of tokens function totalSupply() constant returns (uint256 supply) {} /// @param _owner The address from which the balance will be retrieved /// @return The balance function balanceOf(address _owner) constant returns (uint256 balance) {} /// @notice send `_value` token to `_to` from `msg.sender` /// @param _to The address of the recipient /// @param _value The amount of token to be transferred /// @return Whether the transfer was successful or not function transfer(address _to, uint256 _value) returns (bool success) {}/// @notice send `_value` token to `_to` from `_from` on the condition it is approved by `_from` /// @param _from The address of the sender /// @param _to The address of the recipient /// @param _value The amount of token to be transferred /// @return Whether the transfer was successful or not function transferFrom(address _from, address _to, uint256 _value) returns (bool success) {} /// @notice `msg.sender` approves `_addr` to spend `_value` tokens /// @param _spender The address of the account able to transfer the tokens /// @param _value The amount of wei to be approved for transfer /// @return Whether the approval was successful or not function approve(address _spender, uint256 _value) returns (bool success) {} /// @param _owner The address of the account owning tokens /// @param _spender The address of the account able to transfer the tokens /// @return Amount of remaining tokens allowed to spent function allowance(address _owner, address _spender) constant returns (uint256 remaining) {} event Transfer(address indexed _from, address indexed _to, uint256 _value); event Approval(address indexed _owner, address indexed _spender, uint256 _value); } contract StandardToken is Token {function transfer(address _to, uint256 _value) returns (bool success) { //Default assumes totalSupply can't be over max (2^256 - 1). //If your token leaves out totalSupply and can issue more tokens as time goes on, you need to check if it doesn't wrap. //Replace the if with this one instead. //if (balances[msg.sender] >= _value && balances[_to] + _value > balances[_to]) { if (balances[msg.sender] >= _value && _value > 0) { balances[msg.sender] -= _value; balances[_to] += _value; Transfer(msg.sender, _to, _value); return true; } else { return false; } } function transferFrom(address _from, address _to, uint256 _value) returns (bool success) { //same as above. Replace this line with the following if you want to protect against wrapping uints. //if (balances[_from] >= _value && allowed[_from][msg.sender] >= _value && balances[_to] + _value > balances[_to]) { if (balances[_from] >= _value && allowed[_from][msg.sender] >= _value && _value > 0) { balances[_to] += _value; balances[_from] -= _value; allowed[_from][msg.sender] -= _value; Transfer(_from, _to, _value); return true; } else { return false; } } function balanceOf(address _owner) constant returns (uint256 balance) { return balances[_owner]; } function approve(address _spender, uint256 _value) returns (bool success) { allowed[msg.sender][_spender] = _value; Approval(msg.sender, _spender, _value); return true; }function allowance(address _owner, address _spender) constant returns (uint256 remaining) { return allowed[_owner][_spender]; } mapping (address => uint256) balances; mapping (address => mapping (address => uint256)) allowed; uint256 public totalSupply; } //name this contract whatever you'd like contract ERC20Token is StandardToken { function () { //if ether is sent to this address, send it back. throw; } /* Public variables of the token */ /* NOTE: The following variables are OPTIONAL vanities. One does not have to include them. They allow one to customise the token contract & in no way influences the core functionality. Some wallets/interfaces might not even bother to look at this information. */ string public name; //fancy name: eg Simon Bucks uint8 public decimals; //How many decimals to show. ie. There could 1000 base units with 3 decimals. Meaning 0.980 SBX = 980 base units. It's like comparing 1 wei to 1 ether. string public symbol; //An identifier: eg SBX string public version = 'H1.0'; //human 0.1 standard. Just an arbitrary versioning scheme.// // THIS IS WHAT YOU NEED TO DO - CHANGE THE BELOW TO REFLECT YOUR CHOICES FROM WHAT YOU CHOOSE ABOVE IN RED // //make sure this function name matches the contract name above. So if you're token is called TutorialToken, make sure the //contract name above is also TutorialToken instead of ERC20Token function ERC20Token( ) { balances[msg.sender] = NUMBER_OF_TOKENS_HERE; // Give the creator all initial tokens (100000 for example) totalSupply = NUMBER_OF_TOKENS_HERE; // Update total supply (100000 for example) name = "NAME OF YOUR TOKEN HERE"; // Set the name for display purposes decimals = 0; // Amount of decimals for display purposes symbol = "SYM"; // Set the symbol for display purposes } /* Approves and then calls the receiving contract */ function approveAndCall(address _spender, uint256 _value, bytes _extraData) returns (bool success) { allowed[msg.sender][_spender] = _value; Approval(msg.sender, _spender, _value); //call the receiveApproval function on the contract you want to be notified. This crafts the function signature manually so one doesn't have to include a contract in here just for this. //receiveApproval(address _from, uint256 _value, address _tokenContract, bytes _extraData) //it is assumed that when does this that the call *should* succeed, otherwise one would use vanilla approve instead. if(!_spender.call(bytes4(bytes32(sha3("receiveApproval(address,uint256,address,bytes)"))), msg.sender, _value, this, _extraData)) { throw; } return true; } }
This code is from the good people at Code-Factory. You can see if they have any newer code here. The above code is displayed in three parts, combined into one section for ease here. The code is from February of 2017, v 0.4.4.
When you are filling in the four fields, one funky aspect that you will want to pay attention to is the decimal portion. Examples: If I wish to create 1,000,000,000 billion tokens and I want 18 decimal points, then I have to add 18 zeros onto the 1 billion number. This number is added to two fields in your code. So for 1 billion coins with 18 decimals point would look like 1000000000000000000000000000 and do not add commas to your code. Another example, if you do not want any decimal points then you would not add any extra zeros. Last example on this, if you want 8 decimal points, you would add 8 zeros to the 1,000,000,000 billion so it would look like 100000000000000000. Most cryptocurrencies have 18 decimals.
- Number of Tokens You Will Assume = 1000000000000000000000000000
- Total Tokens in Circulation = 1000000000000000000000000000
Part 4: Testing via Ropsten Test Net
It is time to take your modified code – all four lines – and test it out. You could test this in Ethereum’s live environment, but that would be a waste of money (a few dollars up to $8) for each time it doesn’t work. So make sure you are on the TestNet of Metamask.

Download MetaMask Chrome plugin. This is a digital wallet which can store Ethereum based tokens (ERC20), like the one you are going to make. You can also deploy smart contracts via this robust little app. MyEtherWallet, is also another option, but for this overview, I am using MetaMask for ease.
When you create any digital wallet, the seed (a bunch of random words) is something that you will want to take the utmost care around securing. If you lose these words (essentially your password) you will lose complete access to your wallet on the blockchain and there is no way to recover this – none. So keep it safe and secure – preferably offline.
The next step is to drop your doctored code into a compiler, which reviews the code for errors, identifies code that could be better defined, and then publishes that code directly to Ethereum’s blockchain. Click on Solidity Remix IDE Compiler and copy and paste the code you modified in your text editor into the compiler.
Open your MetaMask wallet, which should be a tiny icon on the upper right corner of Chrome. When it is open, make sure you change the network to “Ropsten TestNet” by clicking the little arrow.

Once you do this, you will need to add fake ETH to the TestNet. Since this is a test network, you get free fake ETH from the network, but you have to request it. If you don’t have any of the foe ETH, you will not be able to send your contract to the blockchain.
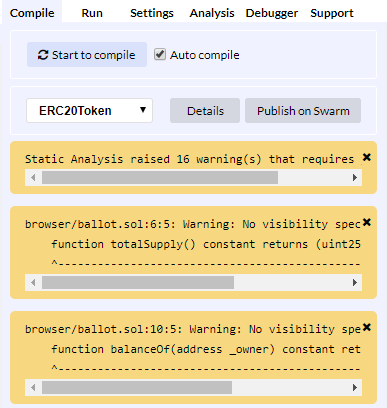
If you get a bunch of yellow errors in the right panel, don’t worry, these are cautionary and not fatal. It may look like this. Again, it should pose any problems.
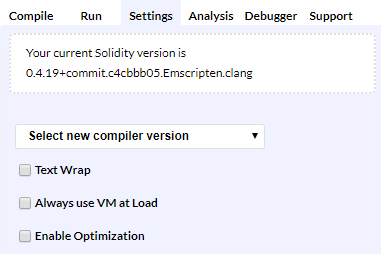
Next you will need to go to the actual version of the compilier and make sure you are not using a “nightly” version. It defaults to the correct version for me, but just make sure it does not say “nightly”. The arrow drop down is where you can change the version, if necessary. Make sure you write down which version you choose, as you will need this later.
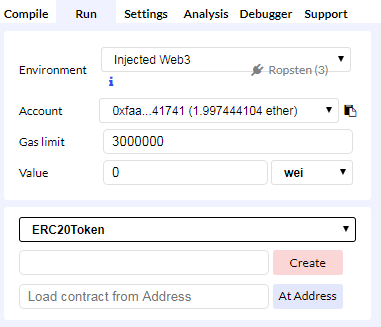
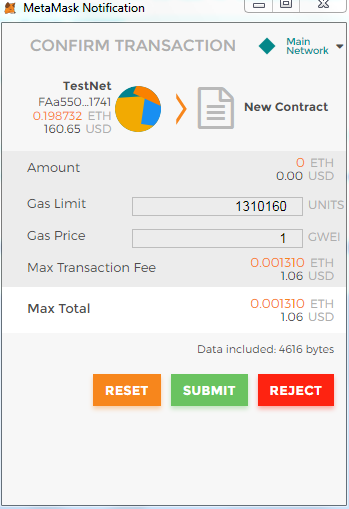
Now head back to to the “Run” tab on the same screen and click “Create”. What is fascinating is that the compiler automatically connects to your MetaMask Wallet in your browser to create the contract. As previously mentioned, more then likely the first time you do this you will have to request or add fake ETH to the TestNet. Since this is a test network, you get free fake ETH from the network, but you have to request it. If you don’t have any of the foe ETH, you will not be able to send your contract to the blockchain. This sometimes take a bit of finagling.
So below, click “create” and the MetaMask wallet will pop up over your browser. As mentioned, if you don’t have any fake ETH, will ask you to generate them – request 1 ETH.
Click “Submit” to generate the contract.
Now click on the date listed below and it will take you to the live generation of the contract via Etherscan.
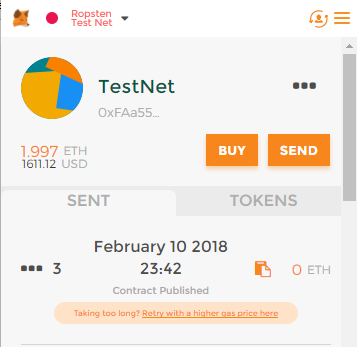
If all went well, you will see something like the below. A green check is great.

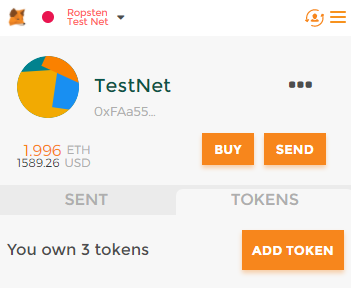
If you made it this far, now it’s time to load your tokens into your wallet.
Part 5: Loading New Token in Your Wallet

Grab (copy) your contract address which will be different than what you see above and go to MetaMask. Click “Add Token”
You should see the following where you enter your Contract Address which you copied from Etherscan. Also add the Token Symbol and Decimals and click “Add”.
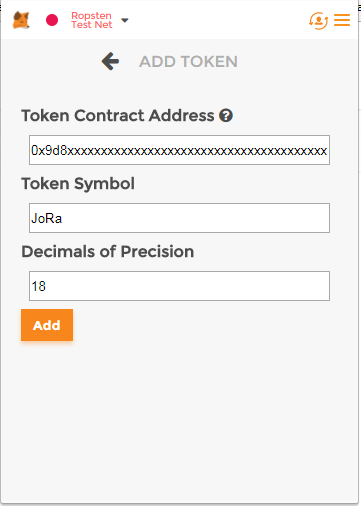
There you go! It should be added to the list. I have 1 billion JORA tokens now.

Part 6: Verify Your Code
One item, which is not essential, but shows that you are not too shady is verifying the code you used.
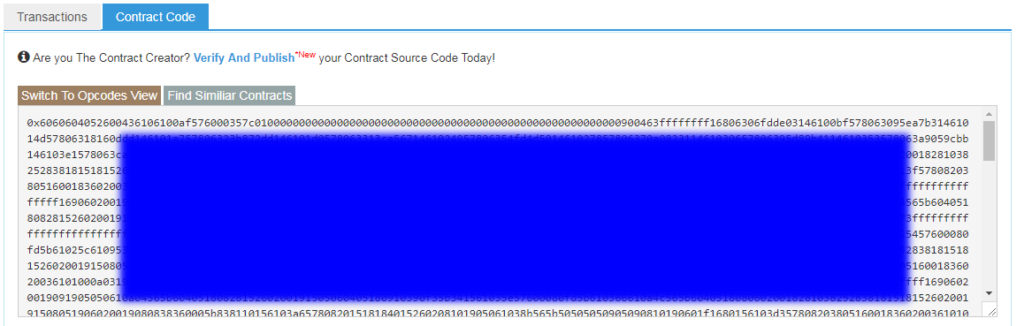
On the Etherscan page, where you have the contract ID, click on that link.

Then on the following page look for the “Contract Code” tab and click “Verify And Publish”
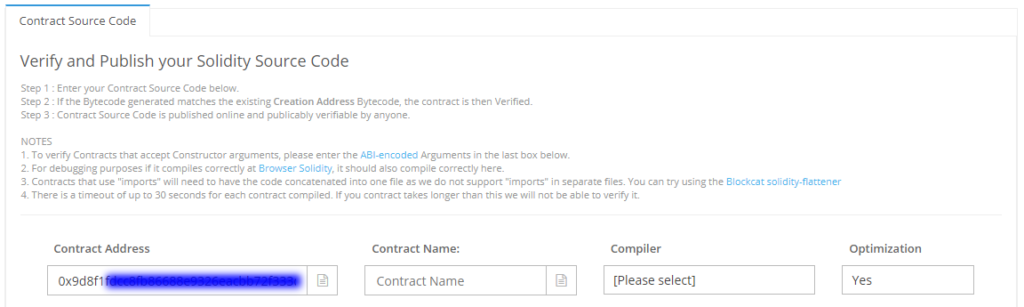
The next screen will look like this with the contract ID already populated. You need to fill in the “Contract Name” with “ERC20TOKEN”, then select the correct “Compilier” – make sure it is the same version you wrote down earlier which is not the “nightly” and change “Optimization” to “No”. Then copy and paste the whole section of code from the compilier into the big text box. Forget all of the other parts and click “Verify” at the very bottom of the page.
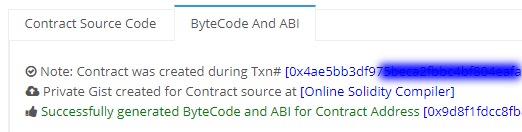
Now if that all worked, you should get the following:
If that all worked, you are good to go! The next part is actually doing on the real official Ethereum blockchain.
Part 7: Launch Your Token on Prod
Now simply go through the same process by on the live Main Network site. So go to MetaMask and hit the drop-down box and change it to “Main Network”.

Now go through Part 4 – 8. You will need ETH for this final stage.
Part 8: Verification:
If you want to be verified, look to do so by filling in the following information on Etherscan. This is vetted by the organization so you do need this to be approved for this portion.
To update your ERC20 token information please provide us with the following information:
Firstly, check that your token contract source code has been verified.
1. Contract Address: 0xd5XXXXXXXXXXXXXXXXXXXXXXXXX
2. Official Site URL:
3. Link to download a 28x28png icon logo:
4. Official Contact Email Address:
5. Link to blog (optional):
6. Link to reddit (optional):
7. Link to slack (optional):
8. Link to facebook (optional):
9. Link to twitter (optional):
10. Link to bitcointalk (optional):
11. Link to github (optional):
12. Link to telegram (optional):
13. Link to whitepaper (optional):
14. CoinMarketCap Link (PriceData):
That is it! Please let me know how this goes for you.
Reference @maxnachamkin
Leave a Reply
You must be logged in to post a comment.